Stepwise processing is started by selecting the Maximum Probability Atlas tab.
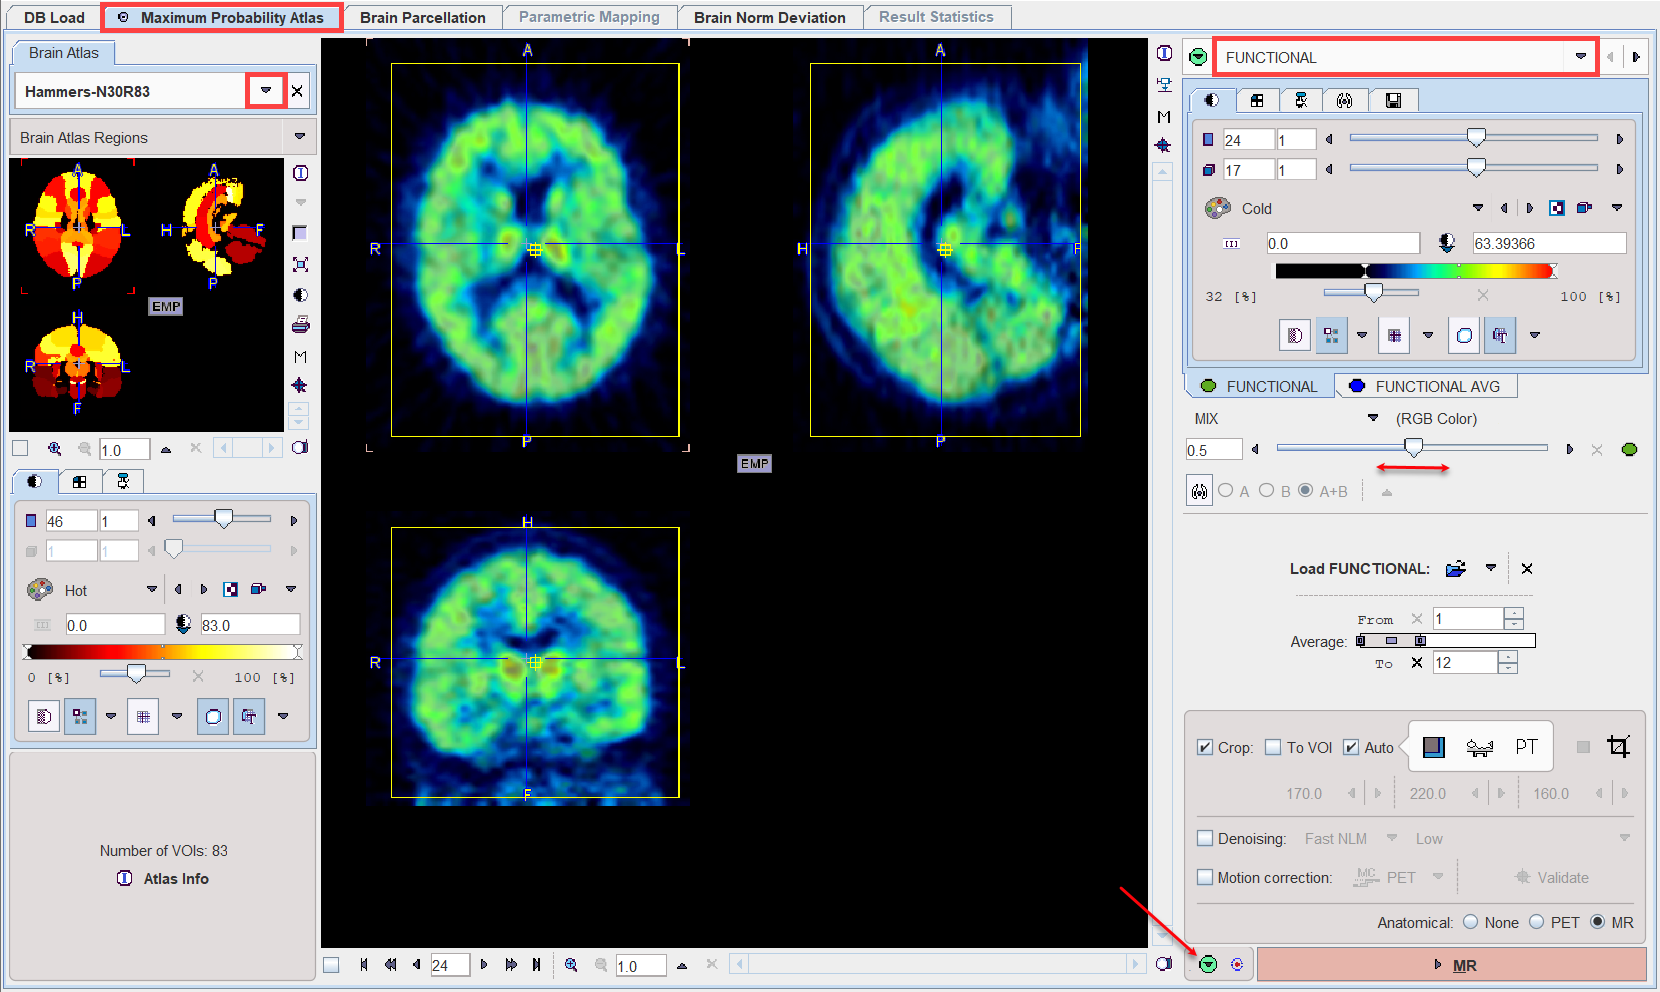
The Load FUNCTIONAL button for loading the PET images is located in the right control area. As usual it is an option button which needs to be set to the appropriate data format with the indicated arrow. For loading images which are not saved in a PMOD database i is recommended to use the Autodetect format. Note that the PET series may be static or dynamic.
In the case of a dynamic PET series, a new series is generated by averaging a range of frames and assigned to the FUNCTIONAL AVG tab. The averaging range can be defined by the From and To number fields, or dragging the range indicators in the Average bar. After any modification of the range, the average is recalculated and the display updated.
The original and the averaged images are shown in a fusion rendering which can be controlled in the area below the controls of the individual images.
The aim of the averaging is to generate an image with as detailed anatomy as possible for the rigid matching with the MR image.
PET Image Cropping
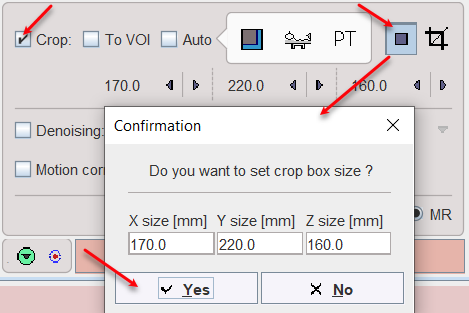
If the PET field-of-view is larger than the brain, the data set should be reduced in order to save RAM and optimize processing. This can be achieved by enabling the Crop box and defining a crop box which appears as yellow rectangles in the image overlay.
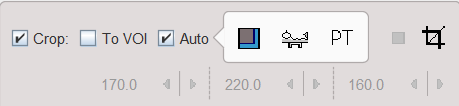
Note: The cropping elements are only shown when the option area is expanded by the colored arrow indicated above.
There is an automatic cropping function available. It is based on the matching of brain templates to the images. To this end the species and the modality have to be set properly by the configuration buttons illustrated below.
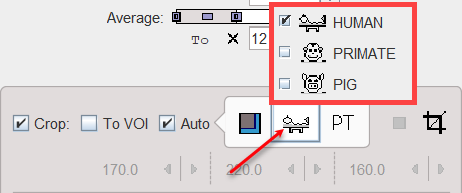

As soon as the Auto option is checked, the process is started. It results in the placement of the yellow cropping box, which can be inspected by the user.
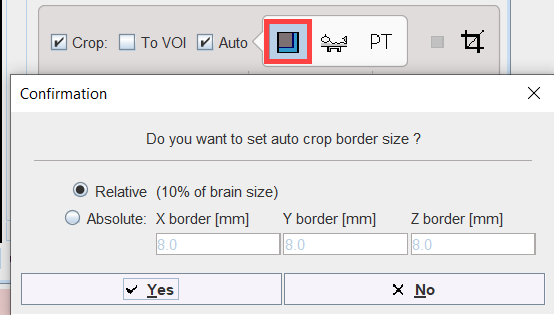
Non-specific tracer uptake outside the brain itself can still be of use in rigid matching to the MRI, particularly the nose area. The box-shaped icon to the right of the Auto checkbox opens a dialog for definition of the auto crop border size. Two options are supported: the Relative selection sets the border size at a fix value of 10% of the brain size while the Absolute method allows precise mm extension in x/y/z:
Alternatively, the crop box can be set manually as follows. Make sure the Auto box is disabled. Place the yellow crop box by clicking at the brain center. The brain should be fully enclosed. If this is not the case, the edge size in [mm] can be adjusted for each direction by selecting the size in the corresponding list. An alternative is entering the edge sizes using the button indicated below.
The To VOI check box requires the crop box to be defined and saved beforehand (e.g. using the View module) and associated with the image in the database.
The actual cropping has to be started explicitly with the ![]() button. Otherwise, a confirmation will be shown when proceeding to the next analysis step. Note that cropping cannot be repeated.
button. Otherwise, a confirmation will be shown when proceeding to the next analysis step. Note that cropping cannot be repeated.
Image Denoising
If the functional image is very noisy the data set should be denoised in order to improve the results of further steps such as segmentation, matching or quantification. This can be achieved by enabling the Denoising box and defining the level of denoising, Low, Medium or Strong, for the non-local means Fast NLM algorithm:

Note that Denoising cannot be repeated.
Motion Correction
The dynamic PET acquisition may be affected by motion. The data has to be inspected in order to identify where the motion occurs. This can be easily achieved by stepping through the frames using the slider or by playing a cine across time on the FUNCTIONAL tab. In order to apply the correction the Motion correction box has to be activated and the reference image created based on the available options:

The example above illustrates how the reference image is created using the To frame averaged selection. With this approach, a reference image is created by averaging the frames between From and To in the REFERENCE section. In this example a range from 5 to 15 is applied, omitting the noisy short frames at the beginning.
The CORRECTION section specifies the frames which will be matched to the frame average which serves as the reference. Assuming that there was negligible motion in the initial frames, a range from 5 to 33 is specified.
Please refer to the PMOD Image Fusion Guide for additional information about the other options.
Note: The Matching Parameters are tailored to the selected Species but can be further adjusted if needed. The motion correction cannot be repeated.
The outcome of the motion correction can be inspected on FUNCTIONAL page by activating the Validate motion correction button. A dialog window opens displaying the Translation and Rotation parameters for each time frame in each of the x, y and z direction as illustrated below:

To continue loading the MR images please make sure the MR radio button is selected and activate the MR action button in the lower right.