Input Data
Whenever possible, a brain PET study should be complemented by an anatomical T1-weighted MR study with isotropic high resolution in the order of 1 mm covering the entire brain. This will allow the accurate adjustment of the brain structures to the subject anatomy and conveniently support any interactive fine adjustments.
Evaluation Space for PET Statistics
The calculation of the PET VOI statistics can be performed in any of the available image spaces, i.e. depending on the available input data: the MNI template space, the MR space and the original PET space. If the user would like to avoid any interpolation of the original PET values, the original PET space should be used. In this case, the user is strongly encouraged to reconstruct the PET images with a pixel size of about 1 mm. Otherwise, the brain VOIs will be truncated and become coarse.
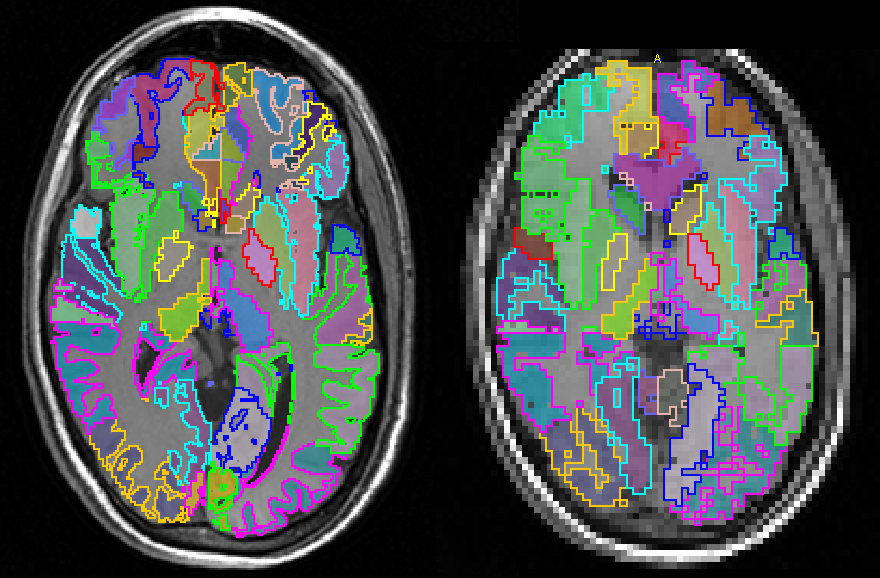
The resolution effect on the VOIs is illustrated below. The left image shows the brain contours with the resolution of an MR image (0.8mm in-plane), the right with the resolution of a PET image (2.4mm). Note that the correspondence of the slices is only approximate.
Species Selection
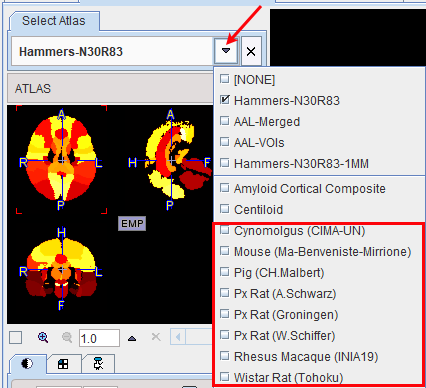
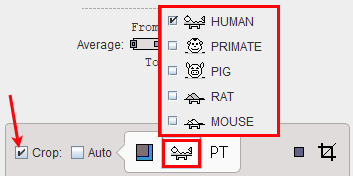
Global species selection in PNEURO is governed by the Atlas selection . However, species is also relevant for cropping settings (see below). PNEURO tries to guess the Species type from the loaded data. If it is not appropriate, please change the Species using the selection button.
The settings for species selection are available in the PNEURO configuration dialog ![]() :
:
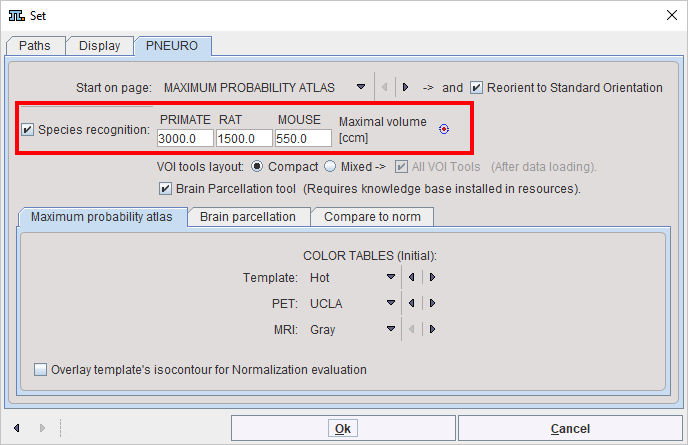
Image Cropping
The algorithms for brain segmentation in the PNEURO modules work best if the images do not contain a large amount of information from outside the brain. Therefore, after loading the MR and PET images, PNEURO offers an automatic cropping facility as illustrated below.

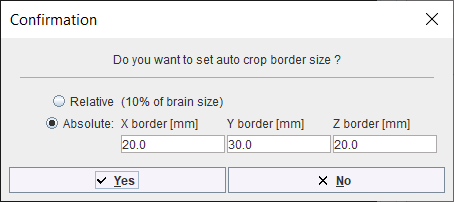
To enable the auto cropping option, please check the Crop and the Auto boxes. Consequently, blue rectangles are overlaid on the images indicating the extent of the cropping box. Based on the species and modality settings, the program automatically performs a deformable matching to the corresponding template to identify the optimal size and placement of the cropping box. The dimension and location of the cropping box are updated automatically at the end of the calculations. In some cases it can be useful to enlarge the default box used for automatic cropping in either x/y/z dimensions. For example, expansion in y can be used to include the nose in the cropped image, which can be beneficially in PET to MR matching. The ![]() icon to the right of the Auto checkbox opens the expansion dialog:
icon to the right of the Auto checkbox opens the expansion dialog:
Toggling the Auto checkbox on/off will update the crop with expansion settings taken into account. Automatic cropping (with expansion) is particularly helpful during batch processing.
In case the automatic procedure fails, the cropping box size and placement can be adjusted manually. Only the Crop checkbox need to be checked, as illustrated in the capture below. To move the center of the box simply click into the image. To change the box size in x/y/z directions, use the corresponding selections below the MR and Species selection, or button.
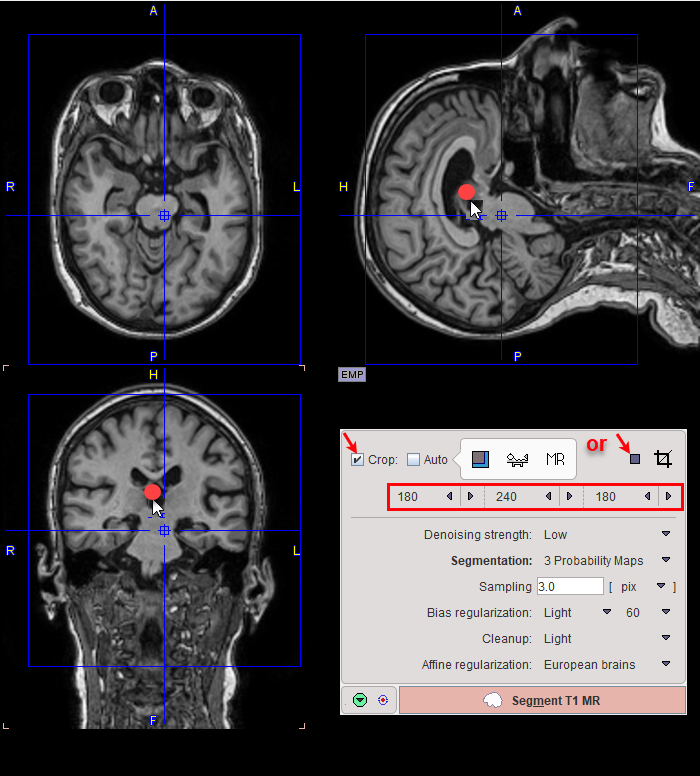
Once the cropping box is properly placed, cropping can be started interactively using the Crop button ![]() (note. the process is irreversible, the series must be reloaded in the event of mis-positioning). If cropping is not performed interactively a confirmation message will appear when progressing to the next stage. After performing a cropping operation, the function is blocked. In order to apply a different crop box the data has to be loaded again.
(note. the process is irreversible, the series must be reloaded in the event of mis-positioning). If cropping is not performed interactively a confirmation message will appear when progressing to the next stage. After performing a cropping operation, the function is blocked. In order to apply a different crop box the data has to be loaded again.