Rigid Matching of Input to Anatomical
In order to transfer the atlas regions determined with the Anatomical image to the Input image, they have to be matched. The matching configuration is available in the lower right.
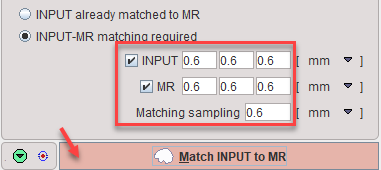
Only in the case of a hybrid scan without cropping, the matching procedure can be omitted by setting the INPUT already matched to MR radio button. In that case the action button label changes to Resample INPUT to MR, meaning that the Input series will simply be resampled at the resolution of the Anatomical series.
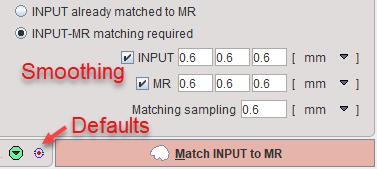
Most cases will require matching and thus INPUT-MR matching required should be set. With this setting PNROD will attempt an automatic rigid matching which has three configuration parameters:
•INPUT and MR checks: If a check is enabled, the image is smoothed before starting the matching process using the specified Gaussian half-widths in X, Y, and Z. However, further processing will proceed with the non-smoothed images.
•Matching sampling: Density of the information used for the matching.
The default parameters can be recovered by the" Defaults" button indicated above.
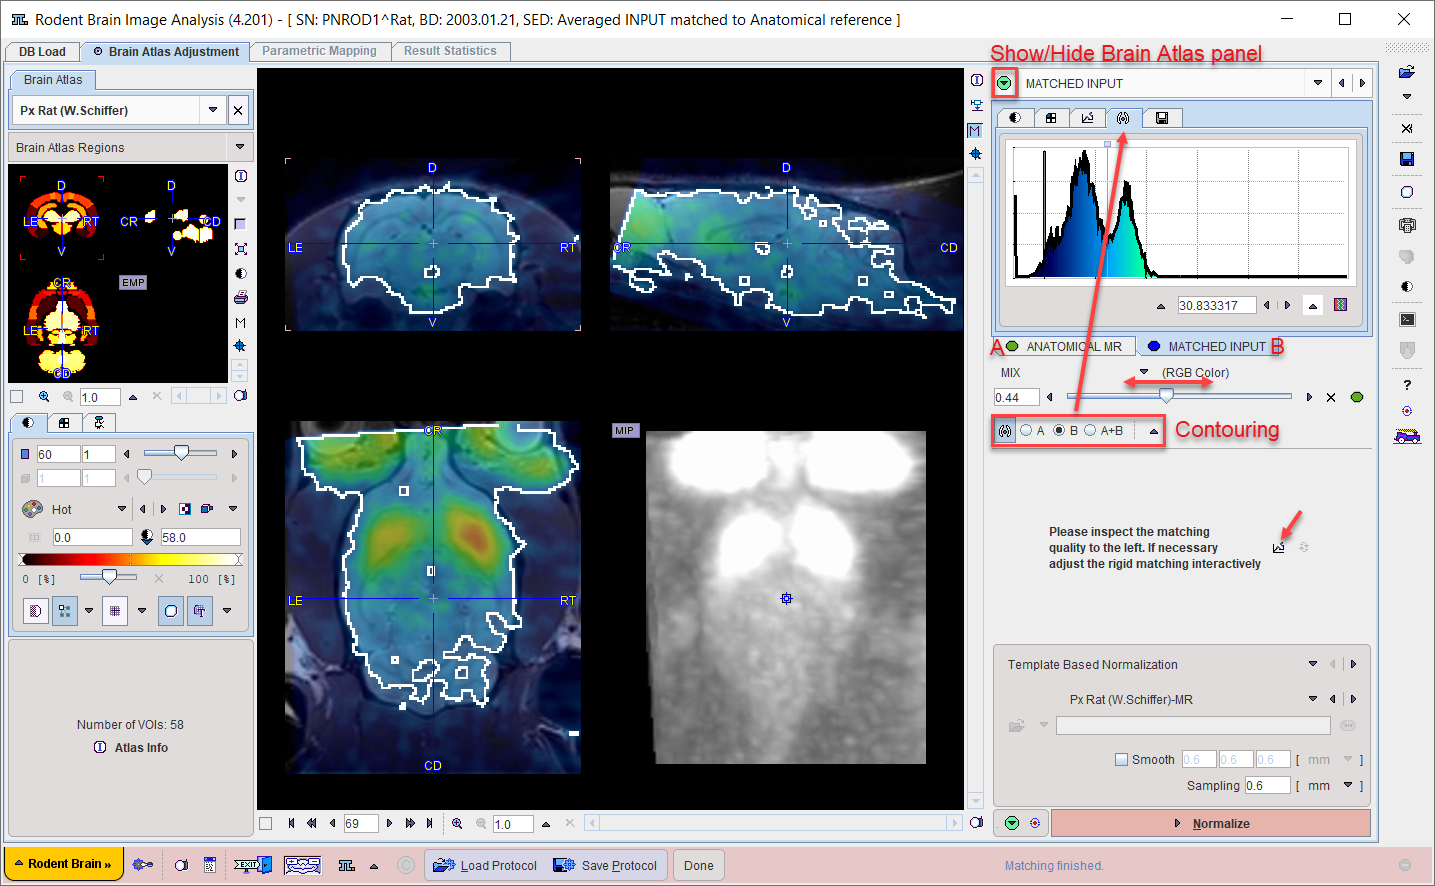
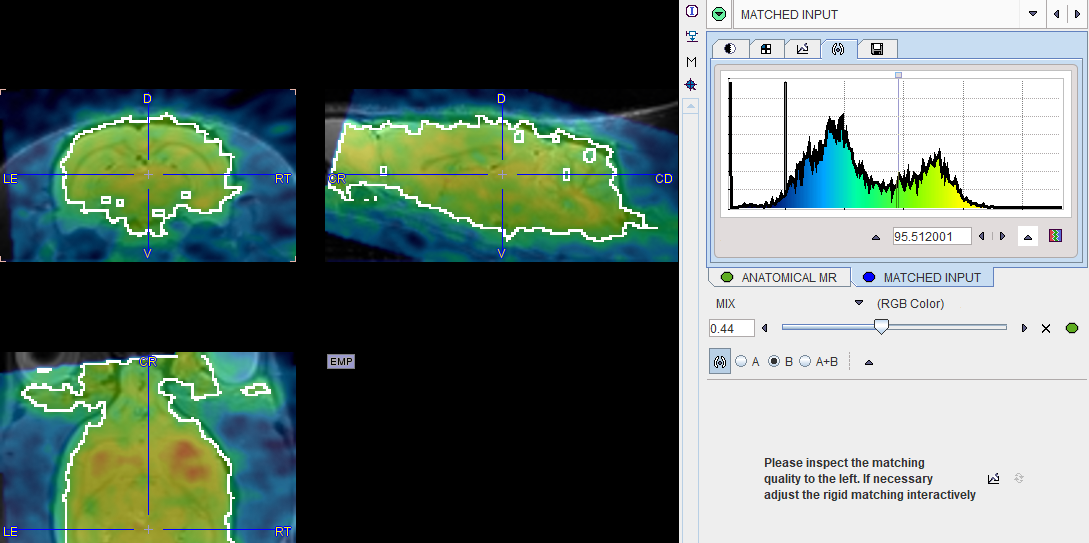
The action button Match INPUT to MR starts the automatic rigid matching and shows the result as a fusion of the Anatomical image with the resampled Input image in the MATCHED INPUT layout. The task for the user is to ensure that the matching is accurate. Otherwise the matching can be adjusted manually, or the user can return to the previous layouts and try again with modified parameters.
Evaluation of Matching
The fusion functionality can be used for assessing the alignment of the images. In the example above, iso-contours of the Input image are overlaid. To this end the contouring has been enabled, the B contours selected (corresponding to the matched Input), and the iso-contouring level adjusted. Useful is also the fusion balance slider, and other fusion modes explained in the Fusion Image Display.
Manual Adjustments
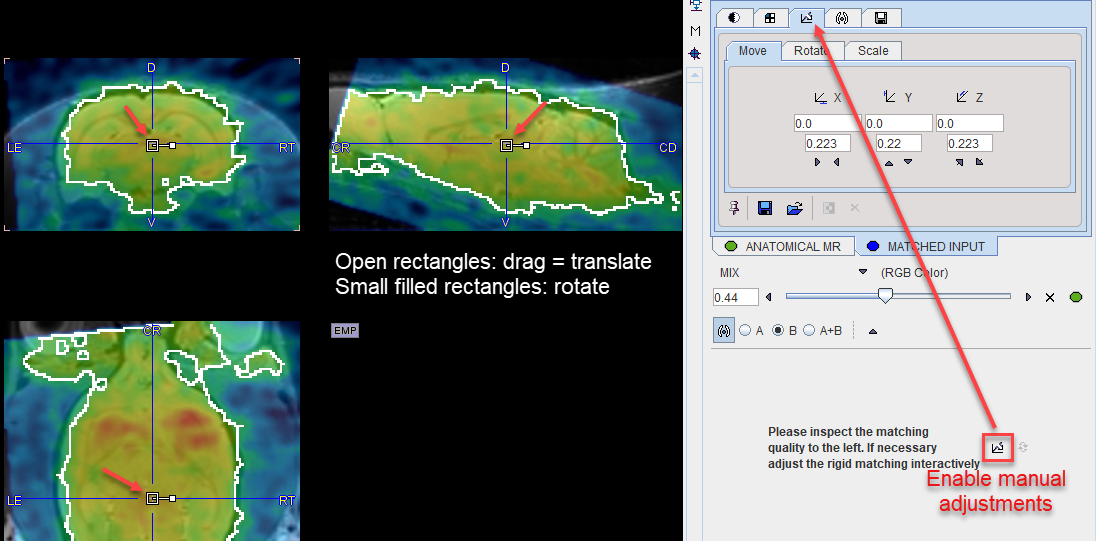
To adjust the matching result please activate the reslicing button indicated below. The control panel with sections Move, Rotate and Scale is opened on the MATCHED INPUT tab, and handles for mouse-operated dragging and rotations appear in the image overlays. Please use the handles for interactive adjustments or enter numerical translation/rotatione values until the match is satisfactory.
Repeating the Prior Steps
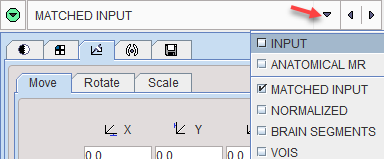
An alternative to (subjective) interactive adjustments is to try improving at the earlier stages. In the dynamic example, a different frame range can be averaged to obtain better brain contours. To do so, select INPUT from the list of layouts
Define an averaging range which focuses more on the time before the late uptake, then use the action button MR to continue to the ANATOMICAL MR layout.
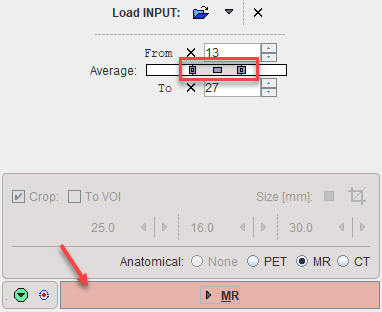
Caution: Don't switch to ANATOMICAL MR via the layout list, because otherwise the new data will not be propagated.
On the ANATOMICAL MR layout continue with the action button Match INPUT to MR.
In the example the result is a bit easier to evaluate because the PET iso-contour now also includes the cerebellum.
If the match is still not yet ok, it is worth trying with different matching parameters. Return to the ANATOMICAL MR layout, modify the smoothing and resampling parameters, and start the matching again.
The next processing step, atlas normalization, is configured on the same page and described in the next section.