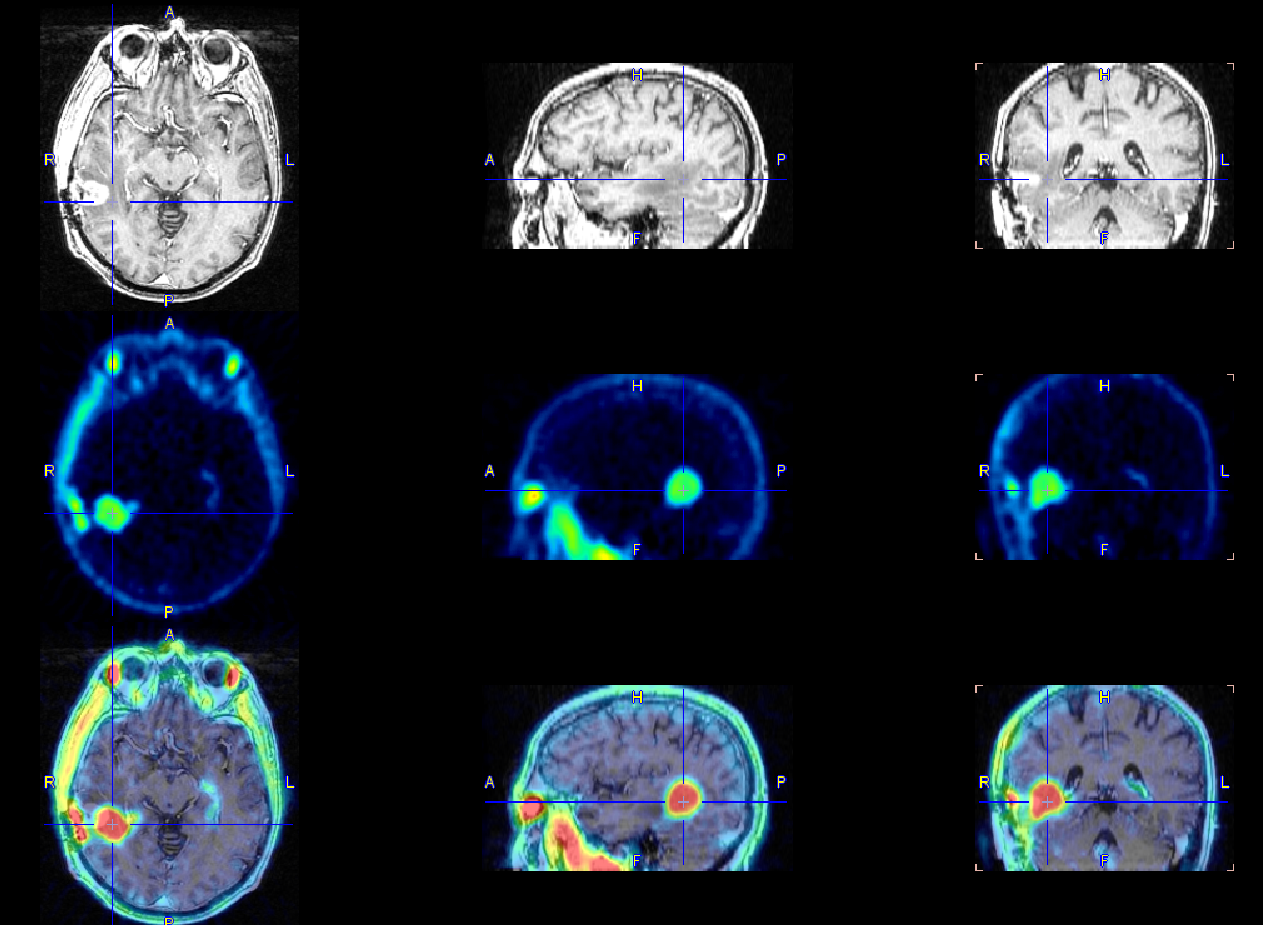
The image display can be configured for up to 6 rows, each showing a fused image.
Layout Configuration
The Number of rows selection serves for defining the number of rows into which the display area is split.
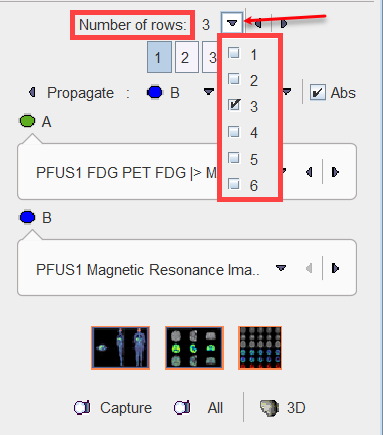
Image Selection
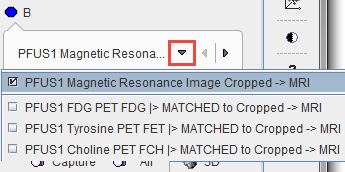
The fused images shown in a particular row are configured with the A and B selections. Initially, the reference series is set as B series for all rows, although with separate display controls. This means that changing the display characteristics in one row has no effect on the reference display characteristics in the other rows.
To change the fused images in a row the row has to be activated first. This can be done by clicking the number to the right of the image, or by selecting the number in the button row below Number of rows as illustrated below:
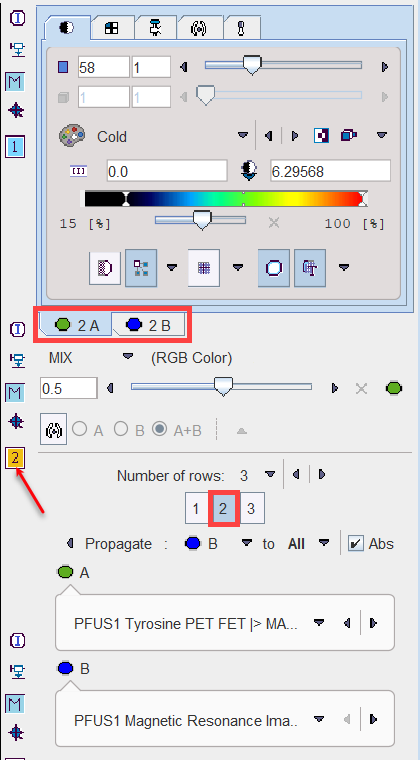
The number next to the selected row is highlighted in yellow (e.g. ![]() ), and the image tabs are labeled accordingly with the number (e.g. 2A and 2B). Next, any series can be selected for the A and B tabs using the corresponding selections.
), and the image tabs are labeled accordingly with the number (e.g. 2A and 2B). Next, any series can be selected for the A and B tabs using the corresponding selections.
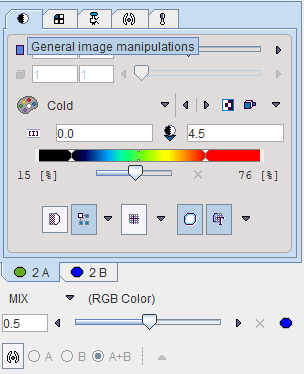
Thereafter, the display characteristics of the two series as well as their fusion can be tailored in the upper right area.
Color Propagation
With multiple rows configuration is rather tedious to change the color scale settings separately in each row for the A or for the B images or for both. FuseIt implements a Propagate facility described below.
Each row shows a fusion image generated from an A and a B series, whereby B plays the role of the reference per default. Therefore, the MR is initially set as B series for all rows.
To propagate for example the B series color adjustments in absolute values from one row (e.g. row 2) select B and enable the Abs box. With the black down arrow select the row to which the same color settings should be applied (e.g. row 3). With the All option the propagation is applied to all the other configured rows.
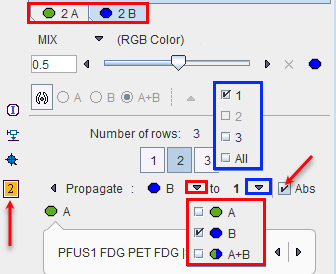
To individually adjust a row it has to be activated first either by clicking the number to the right of the image, or by selecting the row number below the Number of rows as illustrated above. The number next to the selected row is highlighted in yellow (![]() ), and the image control tabs are labeled accordingly (e.g. 2A and 2B). Any series can be selected for the A and B tabs using the corresponding image selections.
), and the image control tabs are labeled accordingly (e.g. 2A and 2B). Any series can be selected for the A and B tabs using the corresponding image selections.
To propagate the color adjustments in percentage threshold of both A and the B series disable the Abs box, select the ![]() option followed by the row selection e.g 1 or All.
option followed by the row selection e.g 1 or All.
Layout Changes
While the orthogonal planes are the default layout which is appropriate for approximately cubic data volumes, the layout can be changed to only show a number of axial, coronal or sagittal slices as illustrated below. The layout change to any image will immediately be applied to the images of all rows, since they are always synchronized.

The M button for enabling/disabling the MIP in the image is available only for the orthogonal planes view
Layout Presets
There are presets for some popular layouts in the lower right.
|
Switches to a single-row whole-body layout as described below. |
|
Switches to a three-row layout which mimics the behavior of the legacy fusion tool: Row 1 shows the reference, row 2 the matched input, and row three their fusion.
This appearance is obtained by selecting the same matched input and reference as images A and B, respectively in all rows. Further, the fusion slider is set to the right, the left and the middle in the rows one, two and three, respectively. |
|
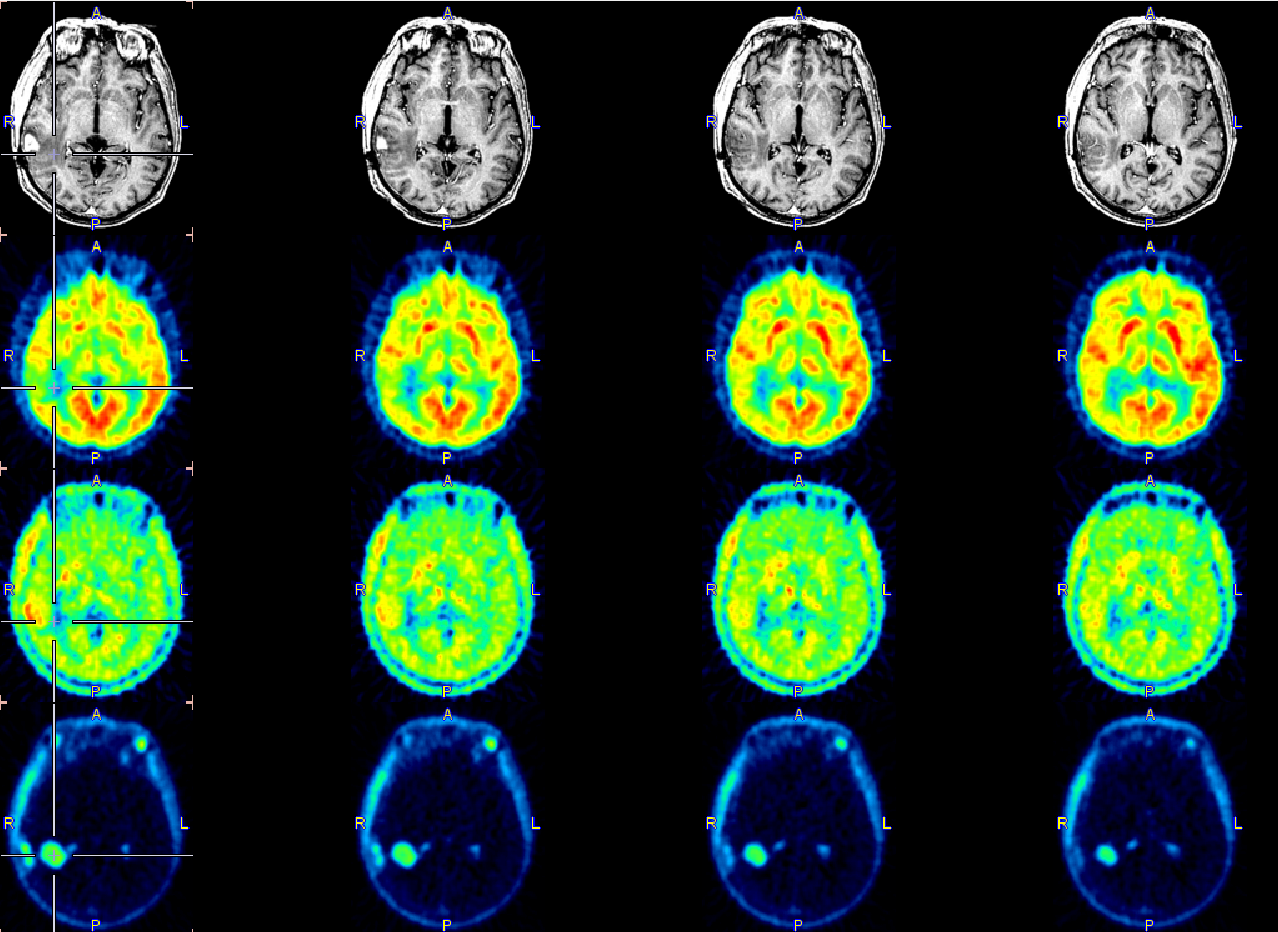
This preset arranges all available images in a separate row and shows them as axial slices. The number of rows therefore depends on the number of loaded and matched images, including the reference.
The appearance is obtained by selecting the series sequentially as image A in all rows, and setting all fusion sliders to the left. |