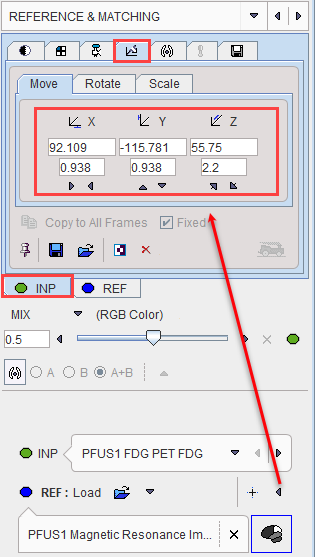
The REFERENCE & MATCHING sub-page is illustrated below. It serves for loading the reference image, matching initialization and for the configuration of the registration method.

Reference Image Loading
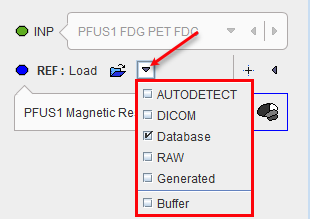
Typically, anatomical images (MR, CT) will serve as the reference, to which the lower-resolved functional input images are registered. Reference image loading is started with the REF Load button, whereby an appropriate file format can be selected using the down arrow.
Note the ![]() convenience button for loading brain templates as the reference in deformable registrations. The loading is species-sensitive and in the HUMAN case shows the available brain templates for the selected normalization procedure as described below.
convenience button for loading brain templates as the reference in deformable registrations. The loading is species-sensitive and in the HUMAN case shows the available brain templates for the selected normalization procedure as described below.
Species Selection
In order to apply tailored presets for the automatic procedures, PFUS tries to guess the Species type from the loaded data according to the criteria in the configuration. If it is not appropriate, please change the Species using the dedicated icon. The available species are HUMAN, PRIMATE, PIG, RAT and MOUSE.
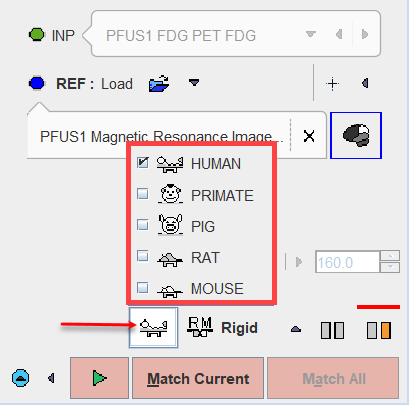
A correct Species setting is important for proper registration defaults.
Fusion Display
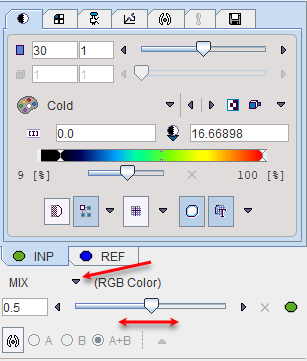
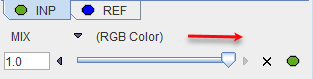
The image display on the REFERENCE & MATCHING page shows a fusion of the REF image with the currently selected INP image. The appearance of the individual images can be adjusted by selecting the corresponding tab and using the image presentation controls, e.g. adjustment of the color thresholds, see below. In the fusion area below the tabs there is a selection arrow for choosing the fusion method (MIX as default), and the slider to change the relative emphasis of the two images in the fusion.
Initialization of Registration
In order to fuse the INP and the REF images PFUS performs an initial alignment procedure. If the images are from a hybrid acquisition and the Hybrid matching method was selected on the LOAD INPUT IMAGES sub-page there are good changes, that the resulting alignment is already final. Otherwise, it is only a preliminary starting point for the registration procedure to follow.
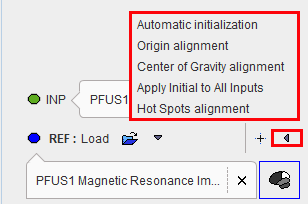
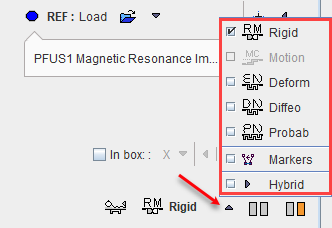
It is important for the automatic registrations that the images on the REFERENCE & MATCHING page show a sufficient overlap. If this is not the case, other initialization types have to be applied which are available to the right of the REF selection:
Note that an initialization results in a translation matrix, which can be inspected on the reslicing tab of the INP series:
The initializations behave as follows.
|
For current INP: Alignment of the INP and the REF image volume center. |
Automatic initialization |
Repeats the initial alignment procedure for all loaded INP images. This is particularly helpful after unsuccessful matching trials. |
Origin alignment |
For current INP: Alignment of the INP and REF coordinate origins. This works if the two series have the origin at the same anatomical landmark. |
Center of gravity alignment |
For current INP: Alignment of the INP and REF gravity centers. This works if the two series have about the same value distribution. |
Apply Initial to All Inputs |
Use the current transformation for all INP series. This works best if the inputs are already aligned. |
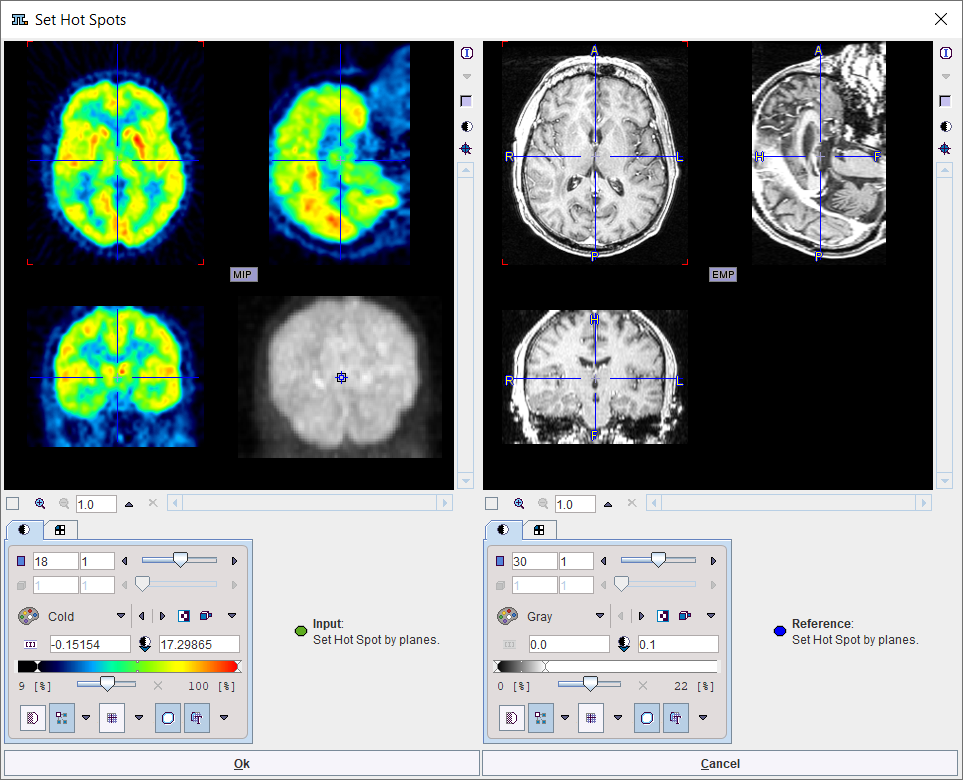
Hot Spots alignment |
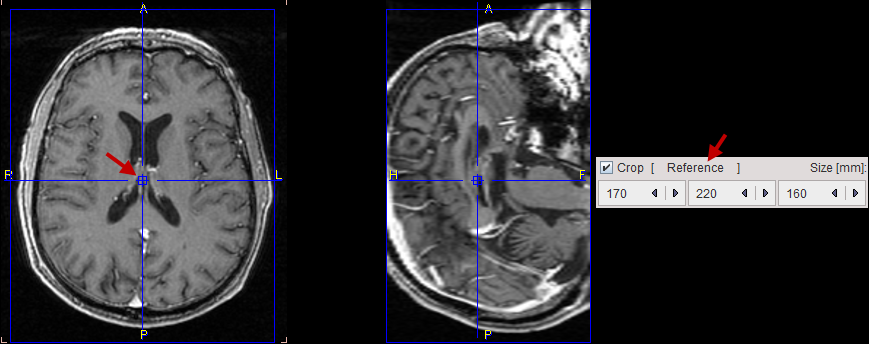
Opens a dialog window showing the Input and the Reference images in orthogonal view on the left and respectively on the right panel. The blue cross indicating the hot spot should be placed at the same anatomical landmark, as as illustrated below:
To perform the alignment of the two locations close the window with the Ok button. Otherwise select the Cancel button. |
Registration Configuration
The current automatic registration method is shown next to the species label. It can be switched to another method with the selection arrow. The methods and their parameters are described in a separate section.
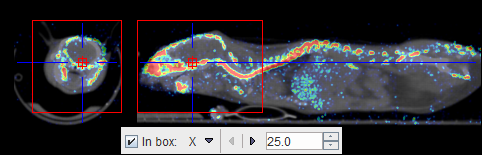
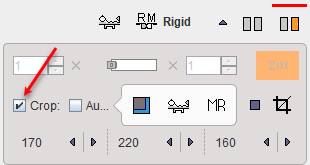
Note the In box option. If serves for restricting the operation of the automatic registrations to a sub-volume of the reference image. The location of the sub-volume is indicated by the red rectangles. As the crop box, it can be positioned with clicking at the center of the volume of interest, and the edge sizes can be changed with the direction selection and the edge length to the right of In box.
Reference Image Cropping
The reference image can be cropped in the same way as the input images. Please shift the fusion slider to the right to only see the reference image
enable the Crop option,
and then adjust the position and size of the blue cropping volume.
The actual cropping has to be started explicitly with the ![]() button. The Auto cropping works as described for the INPUT page.
button. The Auto cropping works as described for the INPUT page.
Averaging of Dynamic Images
If a dynamic reference image is loaded, a frame averaging option is applicable. In the example below a range between frames 12 and 24 is defined.
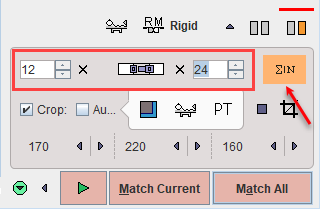
As soon as the indicated averaging button is activated, the time-weighted frame average is calculated and the result replaces the reference image.
Action Buttons
After the reference image has been loaded and prepared by cropping or averaging, the action buttons can be applied.
|
No automatic registration is performed and assumes that all input images are already resampled to the reference geometry. For instance, when the Hybrid matching method was selected the PET image of a PET/CT hybrid scan will be interpolated to the resolution of the CT image. When activated it allows skipping the matching step and visualizing the result on the selected FuseIt page or sub-page . |
|
Starts registration of the selected input image to the reference image using the configured method. |
|
Starts registration using the configured method and sequentially registers every input image to the reference image. |
At the end of the calculations, the result is shown on the MATCHING RESULTS sub-page.