The spatial normalization to the atlas is configured on the MATCHED INPUT layout in the lower right.
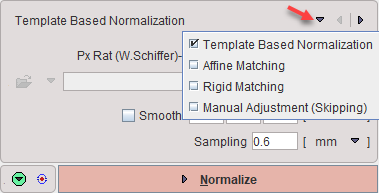
There are four methods available which can be selected as list illustrated above. They are ordered by decreasing complexity.
Template Based Normalization |
Performs an SPM5-type normalization between the Anatomical image of the subject and the selected atlas template image with the usual options. This method first applies scaling and shearing of the subject brain, then iterative elastic adjustments to bring it into agreement with the atlas brain. |
Affine Matching |
Performs only the affine part of an SPM5-type normalization between the Anatomical image of the subject and the selected atlas template image. This method applies scaling and shearing of the subject brain to bring it into agreement with the atlas brain. |
Rigid Matching |
Performs an automatic rigid matching between the Anatomical image of the subject and a selected atlas template image. The result can be adjusted manually. This method assumes a close similarity of the subject brain with the atlas brain. |
Manual Adjustment |
No automatic matching procedure is applied. The user will have to interactively match the Anatomical image of the subject to the selected atlas template image. |
Atlas Configuration
Now is the last chance to select the atlas which is used for the analysis. Each atlas has its own set of normalization templates which will be available when configuring the normalization procedure.
Normalization Configuration
Select the normalization method to be used from the list. The matching parameters below the selection are adjusted correspondingly. All of them require selecting an appropriate normalization template from the available choices as illustrated below.
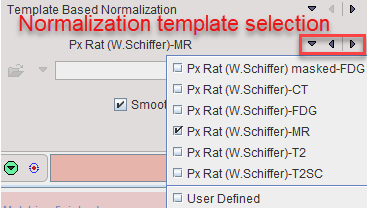
The User Defined entry allows defining an arbitrary file as normalization template, which naturally needs to fit the atlas anatomy.
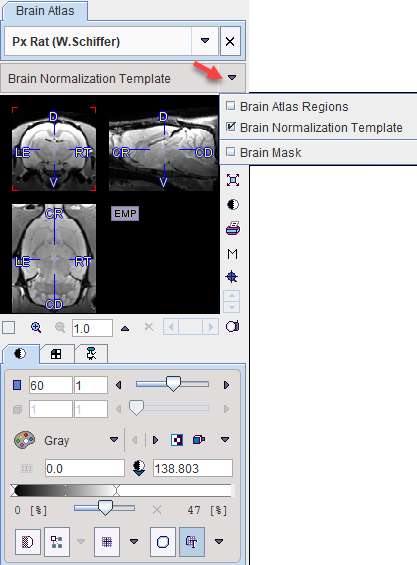
Note that the selected template can be visualized in the Atlas panel by selecting Brain Normalization Template.
The automatic normalization methods have two additional parameters
![]()
•Smooth: Gaussian filtering of the Anatomical series before the procedure starts.
•Sampling: Density of image resampling for the matching procedure.
Start the Normalization
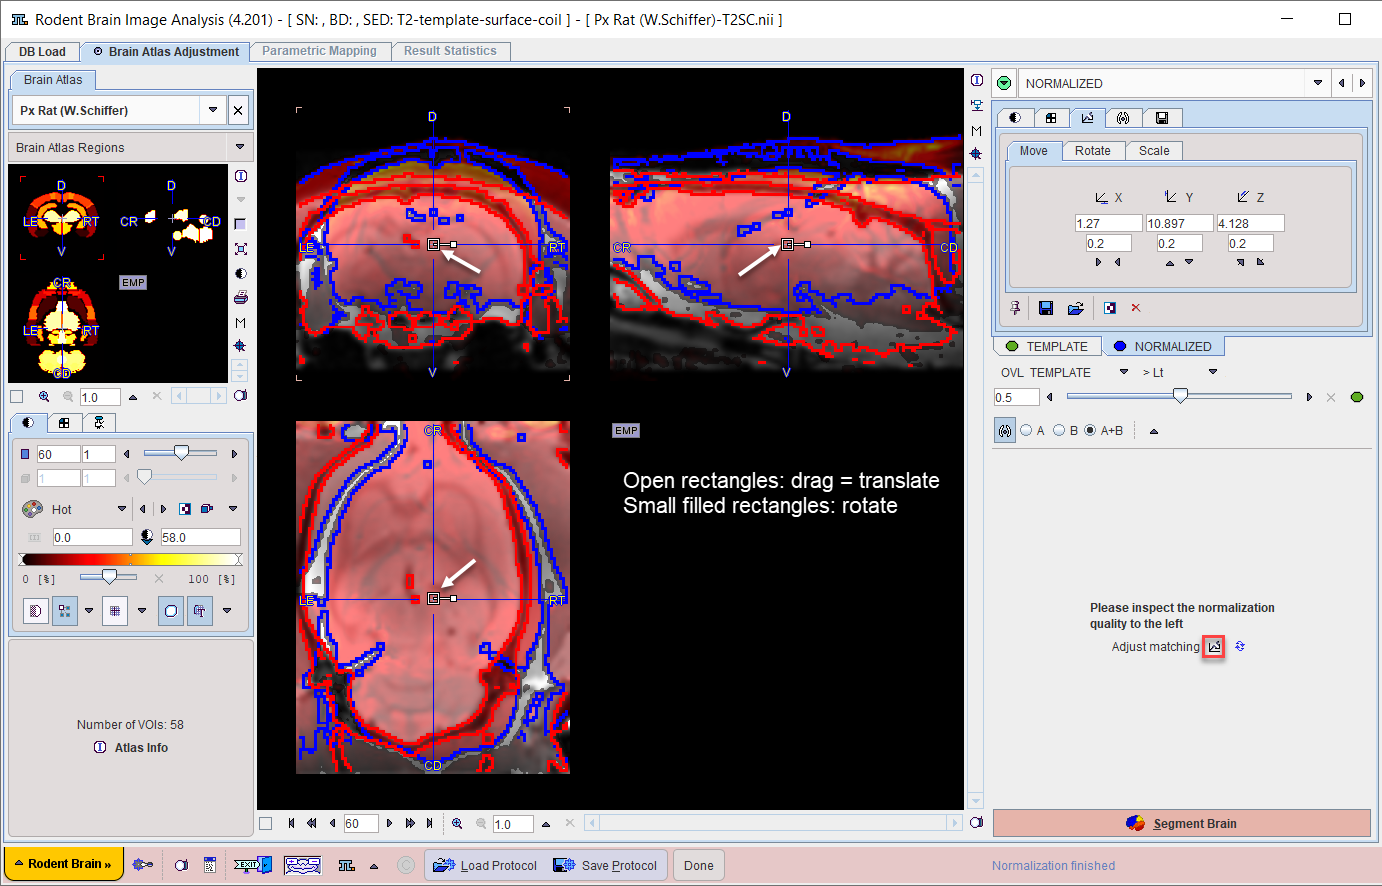
The action button Normalize starts the configured procedure and shows a fusion of the template with the normalized Anatomical image in the next layout NORMALIZED.
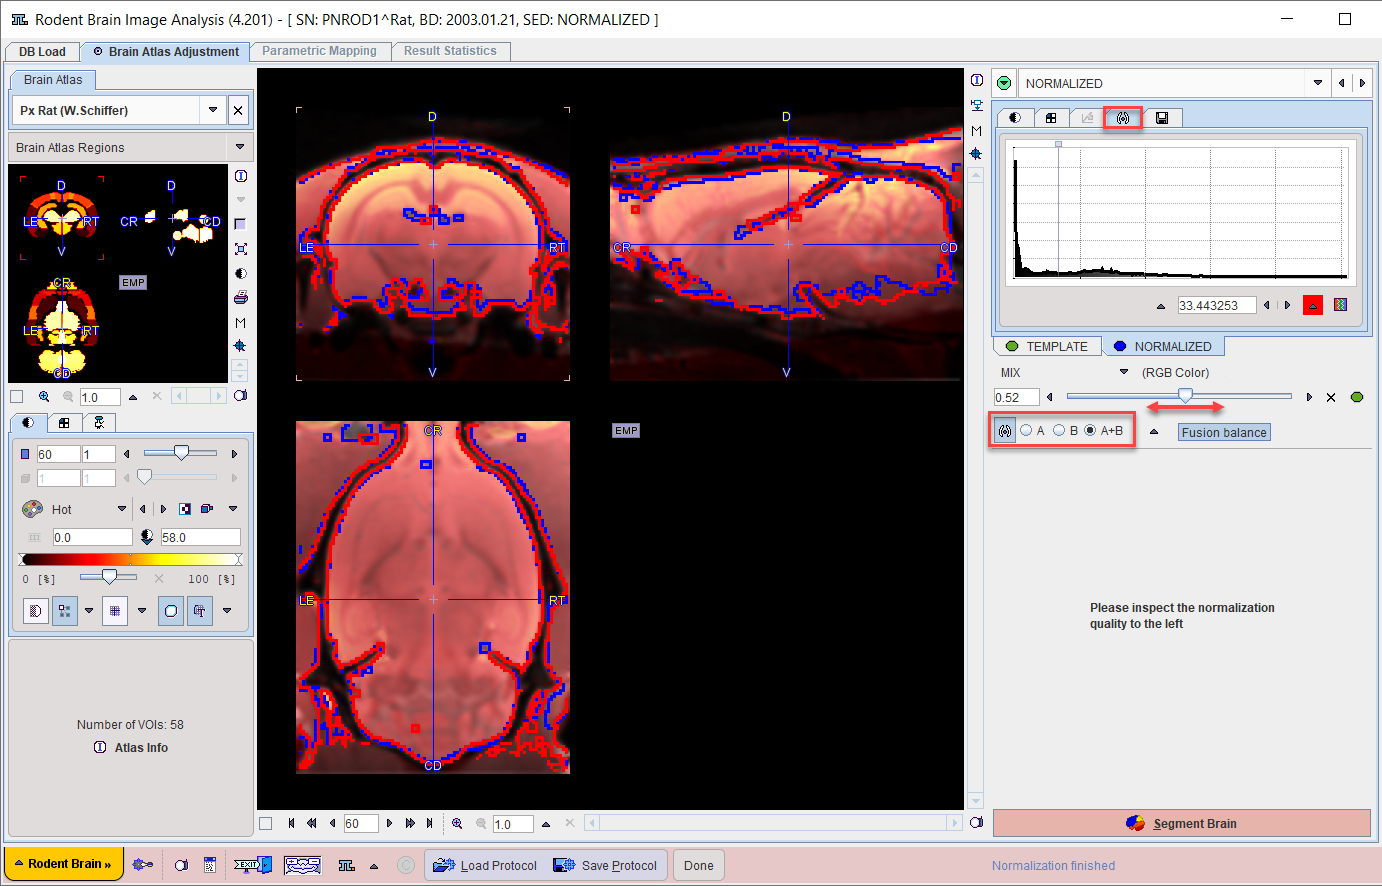
Assessment of the Normalization Quality
In the case of an automatic normalization it is the responsibility of the user to evaluate the normalization quality. Unfortunately, a fully accurate match can hardly ever achieved. Therefore, the assessment is an interactive, subjective task for which the expertise has to be gradually built up.
First, the color table and contrast of the individual images should be optimized. Then, the iso-contour lines, the fusion balance slider, and various fusion modes explained in the Fusion Image Display can be used to assess the degree of the brain alignment. In the example above, the correspondence of the blue (template) and red (Anatomical) iso-contours indicate a good agreement.
Manual Rigid Template Matching
In the case of the Manual Adjustment (Skipping) method the NORMALIZED layout simply shows an overlay of the template with the Anatomical image. As explained before the user has to manually shift and rotate the Anatomical image until the best fit with the template is found. Naturally, the agreement will not be ideal. Note however, that after generating the outline VOIs of the brain regions, they can readily be adjusted further.